Blog

Blog

[awsmjobs

Learning solutions can maximize IT investments


Learning and training is a key ingredient to maximizing ROI in an IT project. It enables employees to effectively utilize the new technology or system being implemented. Here’s an example of how a robust learning and training strategy improved ROI:

Our client invested in a new workforce management system to improve the accuracy of payroll and employee satisfaction. They recognized that without proper training and understanding of the system, their employees might struggle to use it to its full potential.

To maximize ROI, the company developed a comprehensive learning and training strategy that included the following elements:

  1. Training Needs Assessment: They assessed the skill levels and knowledge gaps of their employees related to the IT system. This helped them identify the specific areas that required training and customization.
  2. Customized Training Program: Based on the assessment results, they designed a training program tailored to their employees’ needs. It included a combination of classroom training, online tutorials, hands-on exercises, and access to training materials and resources.
  3. User Adoption Workshops: They organized interactive workshops to promote user adoption and engagement. These workshops encouraged employees to explore the system’s features, ask questions, and share best practices. This fostered a culture of continuous learning and collaboration.
  4. Ongoing Support: The company provided ongoing support and assistance through dedicated help desks, user forums, and regular communication channels. This ensured that employees had access to resources and experts who could address their questions or concerns even after the initial training.

The result of this learning and training strategy was a significant improvement in ROI. Here’s how it happened:

  1. Increased User Adoption: By investing in comprehensive training, employees gained the knowledge and confidence to use the CRM system effectively. This led to higher user adoption rates, ensuring that the new system was fully utilized throughout the organization.
  2. Improved Productivity: With proper training, employees could leverage the system’s capabilities to streamline their time tracking and approval processes, automate tasks, and improve the accuracy of payroll for its employees. This resulted in increased productivity, reduced manual effort, and improved efficiency in managing customer relationships.
  3. Enhanced Data Accuracy: Training helped employees understand the importance of accurate data entry and management within the system. As a result, data quality and integrity improved, leading to better decision-making and improved customer insights.
  4. Enhanced Employee Experience: With a better understanding of the system, employees were able to improve the process of scheduling, tracking and paying employees. This led to improved employee satisfaction, increased loyalty, and potentially higher retention of employees due to their ongoing satisfaction.

In this scenario, the investment in learning and training played a critical role in maximizing ROI for the IT project. It empowered employees to fully utilize the IT system, resulting in improved productivity, payroll accuracy, and employee experience. By focusing on continuous learning and training, the company was able to reap the benefits of their IT investment and achieve a higher return.

Is training for diversity and inclusion broken?

Author Anders Gronstedt

The traditional model of diversity and inclusion training is broken. Recently, the Harvard Business Review explained that the $8 billion D&I training industry is at best ineffective and at worst counterproductive, making participants even more biased.

Meanwhile, a new generation of virtual reality (VR) is hailed as “the ultimate empathy machine.” For instance, you can strap on a reality-bending headset and get a small taste of the bias others endure by walking a mile in someone else’s virtual body. Look at yourself in a virtual mirror as a person of a different gender, age, or ethnicity. After four minutes, you’ll begin to experience the “body transfer illusion”: This superpower maps brains to virtual bodies and can be used to convey how a minority customer, employee, or colleague experiences the world, with the intention to spur people to think and act more inclusively.

Study upon study has validated the “Proteus effect” in which an individual’s behavior in a virtual world is changed by the appearance of their avatar:

My firm, the Gronstedt Group, partnered with Providence Health to innovate unconscious bias training. The third largest not-for-profit healthcare system in the US teaches responses to microaggressions in the workplace with 3D hologram scenarios. The metaverse of real-time, spatial, 3D, immersive, and embodied simulations is upon us and promises to transform inclusion and unconscious bias training.

The bigger diversity opportunity might lie in recruitment. Anyone who has watched the coaches on the television show The Voice, with their red chairs faced away from the singers, has witnessed a blind audition in practice. Overcoming gender-biased hiring by auditioning musicians behind a screen has transformed the face of orchestras. Studies suggest blind auditions increase the likelihood of female musicians being selected by 30 percent. Women now make up half of the New York Philharmonic when 50 years ago they represented only six percent of most orchestras.

Evaluating a drywalling task on a construction site is harder to do blind, or at least it was. Now multiplayer VR provides a shared performance space for participants and instructors to interact seamlessly with hands-on skills without revealing the identity behind their avatars. Less than five percent of painters, drywallers, and glazers are women. The International Finishing Trades Institute (iFTI), the training arm of the International Union of Painters and Allied Trades (IUPAT), is determined to bring that to (at least) 25 percent.

A VR recruitment simulation will help them reach that goal. High school students can step into a virtual construction site developed by my firm. Using both hands, they practice pouring water and mixing joint compounds for drywall finishing. Grabbing a virtual “tape bazooka,” they fill it with the compound, load it with a tape roll, and drag it across a drywall seam, taping it from floor to ceiling. The simulation suspends disbelief, giving young women, who perhaps couldn’t imagine themselves on a construction site, the opportunity to experience a career in the finishing trades during expositions and recruitment drives. This is one of VR’s superpowers, and it’s key to winning diverse talent during the Great Resignation.

NASCAR is leveraging gaming to attract more minority drivers. Rajah Caruth recently took the step from driving a virtual racecar in his bedroom to becoming only the eighth black driver in NASCAR history. He came through the eNASCAR IGNITE esports competition, which was created to recruit young talent by providing a low barrier of entry to the sport. iRacing allows players to race on renowned racetracks from all over the world on a computer with a steering wheel and pedal accessories.

If you don’t think this applies outside of professional sports, think again. Walmart is broadening its talent pool with the first “esports of retail management.” More than 500,000 people have played department manager in the Sims-style Spark City mobile game developed by my firm. Feedback from female users has been overwhelmingly positive. One woman raved, “I’m not a gamer. I hate games, but this is awesome.” Another woman said, “I can play this game all day long.” Walmart has taken the bold step of making the game public on the Apple App Store and Google Play, broadening its reach.

The metaverse revolution promises to broaden recruitment of nontraditional hires, making selection color- and gender-blind and making corporate culture more inclusive. But this is only possible if business leaders rise to the challenge and innovate their way to a more equitable future.

5 Benefits of Workplace Diversity

Author: Ability Options

Diversity in the workplace means the acceptance and inclusion of employees of all backgrounds. A diverse workplace is an important asset, since it acknowledges the individual strengths of each employee and the potential they bring. Valuing the differences of others is what ultimately brings us all together and can be the secret to a successful, thriving workplace and a fair work culture.

What is workplace diversity?

Workplace diversity means respecting and valuing the skills and differences that each staff member brings into the workspace. A diverse workplace is an inclusive environment that provides equal rights and opportunities for all workers, regardless of gender, colour, age, ethnicity, physical ability, sexual orientation, religious beliefs, and so on.

In many countries around the world, it is law for workplaces to provide equal opportunity to their employees, as well as to create a workplace free from discrimination and harassment. Employers are responsible for putting measures into place to overcome employment disadvantage and discrimination in the workplace. This includes valuing workplace diversity and ensuring that a workplace is free from racial and sexual harassment, discrimination, and bullying.

Types of workplace diversity

It’s important to recognise the types of diversity and to provide ways to ensure that you as a workplace, employer, or employee are contributing toward a more diverse and inclusive workplace. Employing staff with barriers to employment and treating them fairly is one of the ways employers can attract a more diverse workplace and diversify the skill sets within a workplace.

There are now funding and incentive schemes in place to encourage businesses to support people with a disability, Indigenous, mature-aged people, and those who have been in long-term unemployment. Here are some tips to help create a more diverse workplace:


  • Discuss diversity with your employees and outline the benefits of a diverse workplace.
  • Identify and address any bias when it comes to the recruitment process. Have hiring managers be aware of the qualities and benefits applicants of varying backgrounds can bring to the company and ensure they are allowing for a fair hiring process. Let applicants know that you are an equal-rights employer.
  • Value the individual skills that employees bring and make sure to utilize these strengths to help broaden your market and grow your company.
  • Allow for flexible work options including flexible hours and less than full time hours
  • Provide the opportunity for parental leave for both women and men.
  • Create and implement your own Workplace Diversity Plan and certification for employees to become familiar with practising diversity and inclusiveness within the workplace.

Benefits of workplace diversity

Having a diverse and multicultural workplace brings several advantages. Since today’s world is increasingly more globalised and interconnected, workplaces should take advantage of the diverse range of skills individuals from different backgrounds and languages can bring. The top five benefits of workplace diversity include:

  • Increased productivity: A diverse workplace allows for more ideas and processes. This diversity of talent means a broader range of skills among employees, as well as a diversity of experiences and perspectives which increases the potential for increased productivity
    Increased creativity: As various cultures and backgrounds work together, the opportunity for increased creativity exists. This is because there are more people with differing perspectives and solutions to problems, allowing for a greater chance of a workable solution to a workplace problem.
  • Improved cultural awareness: A diverse range of cultures within the workplace allows companies to deal with the different nuances within a global marketplace. If a company does business with China, for example, having an employee who can speak Mandarin is an asset and can lead to improved workplace relations.
  • A positive reputation: Companies that have a diverse workplace are often perceived as better employers. Potential employees want an employer who accepts and is tolerant of all backgrounds and who treats their employees fairly.
  • Increase in marketing opportunities: If potential employees or customers see that a company represents a diverse workplace, it makes them feel like they can relate to the company more. Using advertising that depicts mature-aged, differently-abled, or ethnically diverse people encourages applicants to apply, promotes a positive reputation, increases marketplace awareness, and generates a more diverse client-base
    Achieving workplace diversity means you are bringing out the very best of your employees and allowing them to reach their full potential. By doing so, your workplace benefits as it encourages a more varied and innovative talent pool.

Diversify your workplace

If you’re looking to introduce a more diverse approach to your workplace, get in touch with us for training, resources, or start your search for the perfect staff member here.

How to Overcome the Labor Shortages in 2022

You are not alone. Employers across the country are struggling to fill their open positions with qualified talent. As a result, there is increasing demand on employers to offer flexibility. Whether it’s flexible work schedules, personal time off, job sharing, or remote work arrangements, employees are holding out for better choices to stay mentally healthy and safe.

There are also demographic impacts, with some workers affected more than others. Recently, most of the job growth went to men, while women lost jobs or stopped looking for work.

The statistics show that flexible schedules is the top request. For employers looking to find and retain talent, consider the following flexible options:

  1. Job sharing opportunities to allow for flexible hours, in turn helping employers to cover off roles even during vacation season
  2. Remote and hybrid options could attract more candidates as well as address safety concerns related to COVID in the workplace.

By offering these options, you attract and retain people. Additionally, you can improve employee morale and build an inclusive, modern workplace. For more information, see WhenIWork’s blog Labor shortage.


How to bulk upload on Adobe Captivate Prime without using the built-in feature

We have a large client that is using Adobe Captivate Prime. The client requested that we add users in bulk. We first recommended the self-registration approach wherein users self-register. However, they preferred the bulk registration internal learner route.

Here where things get a little bit challenging.

Currently, Adobe Captivate Prime is an LMS System which once you get the hang of it works intelligently but, what happens when things don’t work as expected?

The bulk upload feature via CSV is a pretty standard way of populating data. Basically, we have to have a basic CSV file with a basic data set “Name“, “Email“, “Profile” and “Manager“.

Seems pretty basic right?

Well, I followed Adobe Prime’s instructions to the letter and it didn’t work.

https://helpx.adobe.com/ca/captivate-prime/administrators/add-users-in-bulk.html

I tried many variations in terms of structure and logic. I even downloaded their sample CSV file to see if I could get it to work. Still no luck but was learning more after reading their forums.

https://forums.adobe.com/community/captivate_prime

What, I gleaned off of their forum was that the feature is broken. I assume at one point is was working correctly but, it is fundamentally flawed. The one thing I noticed that it was easy to upload the file but, every time there was an error in the processing. Usually, when you upload a CSV file it will typically update any of the fields that have changed e.g. first name is John not Johnny. However, in Adobe Prime you will get an error. Even with a unique dataset for the CSV there is typically an error with little description to what the problem is e.g. an internal error has occurred.

One thing that I noticed when I tried to manually add a single user via the website it worked without any issue.

Here is some background about myself. I started off in the software consulting world was a web designer but, gradually I learned how to code in a variety of languages and platforms. One experience, that I thought be helpful was during software testing.

Typically, when testing software or websites it becomes very repetitive. That’s when software testing tools come to play. What I used previously was selenium.

https://www.seleniumhq.org/

What selenium does, it allows the end-user to record their actions on the screen. It converts them to scripts which you can automate and program. I’m a Mac user and found that using VMWare wasn’t ideal. I was getting limited success but, thought I was on the right track.

The solution was to record the steps correctly, create a loop and automate it. I found a better tool with lots of documentation.

Katalon Studio is a cross platform solution to run automation tests.

https://www.katalon.com/

The first step is to record the screen accurately. At first, I recorded all the actions e.g. go to URL login, etc. What I really wanted was just to “Add a Single User” and repeat it based off of sample data in a CSV file.

The difficult part was selecting the right elements to record. In Adobe Prime all the fields are very dynamic with unique IDs based off of the user session ID (which means when you shut the browser window and re-open it won’t work). After experimenting with capturing CSS ids and Divs (neither worked well). What seemed to work the best is xpath values.

An example is something like this (don’t worry the tool generates this for you)

Below is the name input field for “Add a Single User“.

xpath=(.//*[normalize-space(text()) and normalize-space(.)=’Name’])[2]/following::input[1]

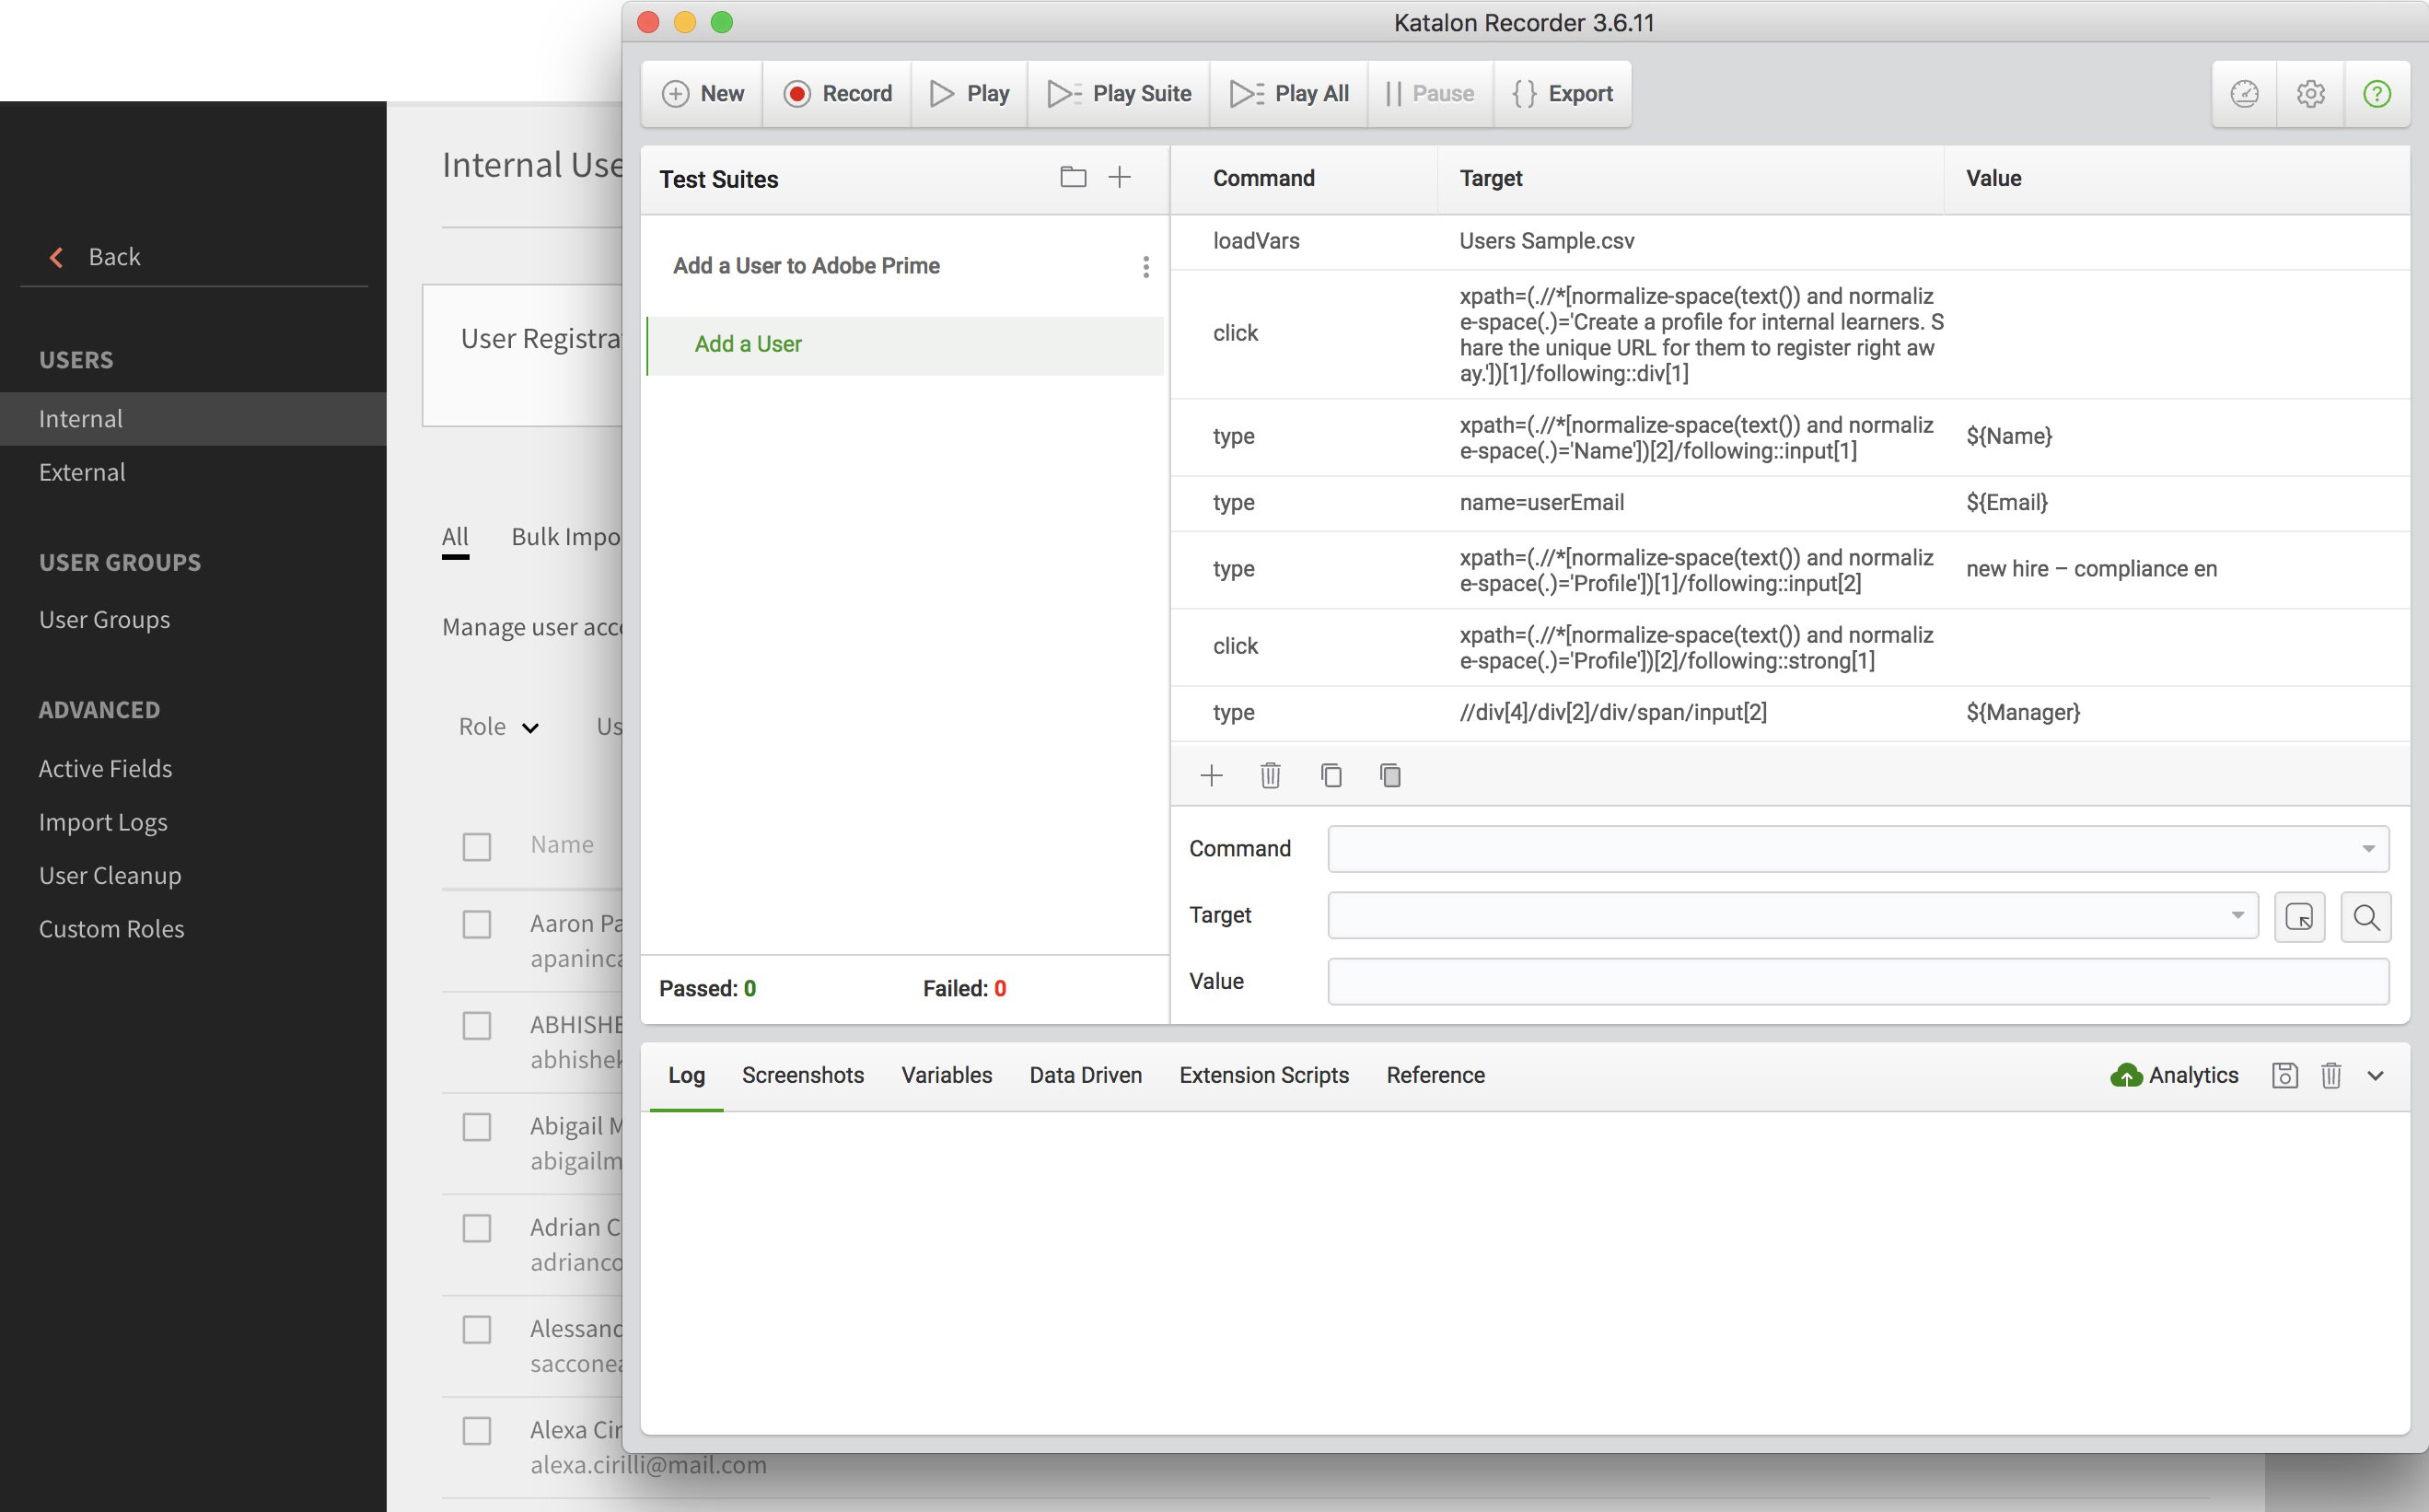
With the tool I was able to capture the flow but, it seemed a little complex. I discovered a sister product which was able to do it perfectly Kantalon Recorder Plug-in for Chrome. I was able to reproduce a dynamic record that would show up as an internal user with a click of a button.

How to automate this?

One record wasn’t really going to help me. What about 10? Or 1000? Well, with this tool I was able to automate it with a CSV file.

The trick was to figure out how to attach a CSV file automate the output and loop through the records.

In the tool there is a tab called “Data Driven“, click “Add CSV File“. The attached file has been added to the tool. I then had to change the hard coded values to dynamic values e.g. John Smith becomes ${Name} (this is the same name as your column header in your CSV file). All I had to was match the header names to the hardcoded values e.g. ${Name}, ${Email}, ${Profile} and ${Manager}.

The one thing I had to do to make the file all work was to add one command at the start.

LoadVars

Target: The Path to your CSV file. I put it at the root of the saved project to make it easy e.g. “My_Data.csv”

At the end add a new command

endLoadVars

That’s it, best off this plug-in is free and cross platform.

Step 1
Install the Katalon Recorder Plug in
https://chrome.google.com/webstore/detail/katalon-recorder-selenium/ljdobmomdgdljniojadhoplhkpialdid

Step 2
Log-in to Adobe Prime as an Administrator

Step 3
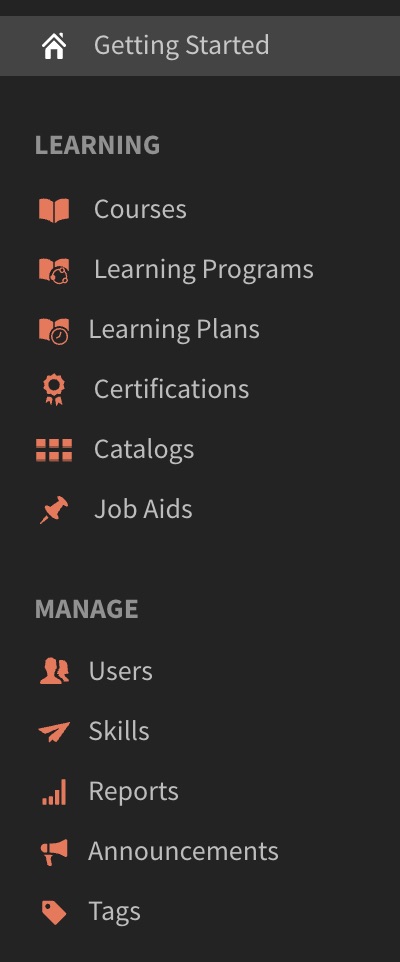
Click on the Side Nav bar to Users

Step 4
Launch the Chrome Extension Kantalon Recorder

Step 5
Open the file in Katalon Recorder
Add a User to Adobe Prime.html
(Please note: this file reads “Users Sample.csv” (which contains a list of all users to be added)).

Step 6
Ensure the speed is set to medium-fast. Click the play all button. This will add all the users from the CSV file to Adobe Prime.
(Please note: this is a one-time use, new users must be added in a new file)

Download the CSV Upload Engine for Adobe Captivate Prime

Good luck! I hope my solution will work for you.

Articulate Storyline 2 versus Storyline 3 which one is better?

With Storyline 2, I was having issues with complex behaviours in HTML5 (e.g. having custom controls, attaching custom variables and passing them to an LMS, and differences between development and published environments).

Here is some my background, I’m a Macbook Pro user using High Sierra running VMWare Fusion. I come from a design background with web and mobile development experience.

I wanted to test to see what the differences were between Storyline 2 and 3. Most of our customers are large organizations and we wanted to test drive Storyline 3 before making a recommendation.

Overall Storyline 3 comes as an improvement to its predecessor Storyline 2.

A trial version of Storyline 3 can be downloaded here:

https://articulate.com/p/trial?product=storyline-3

Some of the main differences between Storyline 2 and 3 are as follows:

New Responsive Player
Storyline 3 has a new responsive player that adjusts the course content to various devices such as smartphones and tablets without any additional programming.

Custom Closed Captions
Storyline 3 supports customizing closed captioning while helping you create more accessible eLearning. It supports all the standard caption files. You can import, export, show and hide the captions at your convenience. You can even use the custom fonts for closed captions.

Superior HTML5 Output
Articulate has put a lot of effort to fine tune the HTML5 output so that your eLearning courses work smoothly on any device. Articulate claims that no matter how custom or complex your eLearning course design gets, it’s going to run on any device or browser. Elearning developers can now choose a format they desire and create responsive HTML5-based eLearning content. All you have to do is simply drag the ‘Publish As’ slider and choose the desired publishing options.

Better Starting Templates
Articulate has some smart looking templates which cover the core features an elearning developer needs.

Our tests upgrading a project from Storyline 2 to 3

I took one of the courses we had previously developed which I had had to customize to get it to work properly.  With Storyline 2, I had to write a fair amount of custom javascript and other workarounds with states and variables in order to get everything to work.

I did a full publish in Storyline 3 and below are my comments:

  • The Storyline 3 player forces older storyline projects to be upgraded. It creates a backup of the older project so no need to worry about losing it.
  • Publish speeds seem about the same.
  • The user interface of the product seems a little faster and more polished.
  • There are different loader screens after publishing – gone is the spinner, now it’s just 3 dots.
  • The HTML5 version seems a little faster in terms of load time.
  • Some of the javascript, tweaks of states etc. I had made previously in Storyline 2 don’t seem to work correctly in Storyline 3.
  • I installed the mobile Articulate Player app.  It didn’t seem to work.  All I got was a blank screen.  I could not bring up menus. (Hmmm not a strong recommendation for mobile only use).
  • I uninstalled the Articulate Player app on my phone and tried again.
  • I viewed the course on an Android Pixel 2 phone which took me to the Google Play store but I got a blank screen.
  • The video player seems to work better in HTML. I’m able to skip to certain sections.
  • The embed code works for videos in HTML5 and Flash (though no one uses it anymore).
  • Good testing for playback on various devices e.g. desktop and mobile.
  • States and Javascripts seem more accurate. When I compare the amount of code I had to add in order for Storyline 2 to work versus 3. It has been reduced greatly.
  • Screen recordings have been greatly improved. Screen elements before were shifting and moving for HTML5. They have all been fixed. Looks solid.

Link to Latest Version of Articulate Mobile Player

https://play.google.com/store/apps/details?id=air.com.articulate.articulatemobileplayer

Samples of Glitchy Screens when Upgraded Project from Storyline 2 to Storyline 3

Image 1: Image of hand is repeated and multiple selections on screen are highlighted simultaneously.

Image 2: Masking seems to cut off the text slightly (see final bullet on page, text is cut off).

Conclusion
Choosing the right elearning authoring tool for responsive mobile learning is a bit overwhelming. Storyline 3 is a simple and intuitive authoring tool with a short learning curve. Though Storyline 3 addresses the concerns of multi-device eLearning, it is not very effective for developing fully responsive eLearning courses. The responsive player shrinks the content to the screen size of the device instead of adapting the layout. Articulate hasn’t made an attempt to address this issue in Storyline 3.  Overall, it fixes many of the Storyline 2 problem in terms of HTML5, though I wouldn’t recommend upgrading existing projects from 2 to 3.  I would recommend however recommend choosing Storyline 3 over Storyline 2.  You’ll save lots of time in testing and coding.

Euphoria is proud to sponsor the Canadian Sport Film Festival

Euphoria Interactive is proud to sponsor the Canadian Sport Film Festival. The festival is running from June 8-10, 2018 at TIFF Bell Lightbox.

Their mission is to provoke dialogue on the power of sport to inspire social change.

Check out their website:

CSFF Sports Film Festival

And hope to see you at the movies.

Here is our promo video which will be screened for the first time at the event.

Using and Setting up Adobe Prime from our Perspective

Here is some background about myself. I come from working in the software and marketing industries being a developer, programmer and a UI UX Designer for a wide variety of platforms. I’m very comfortable troubleshooting Storyline with custom javascript and variables to make it SCORM or Tin Can compliant.

I’d recommend this product for medium to large organizations that require: solid functionality, decent reporting and a mobile friendly experience.

I was given the task of working with a client who had difficulty integrating Adobe Prime as a Learning Management System in their organization. Some of the issues were related to migrating from Adobe Connect (a repository for content that can be consumed for other LMS systems) and others were related to lack of documentation from Adobe Prime.

Here were some of the constraints with the project :

  • The majority of content was designed for Adobe Connect
  • Starting with a large library of content in a variety of formats that were mostly produced by Adobe Captivate
  • Multiple standards from a variety of different vendors
  • Starting with a large number of zipped folders that were made in a variety of formats e.g. zipped versions of Adobe Connect and SCORM 1.2 files
  • Multi-language setup
  • Previous administrator had uploaded Adobe Connect files to Prime
  • Adobe Prime has little documentation, no stackoverflow, no user forums outside of the Adobe community

Where to begin?

Prepping for Adobe Prime

First we had to do a full audit of the zipped files and source files and apply some standards e.g. all files are Captivate 10 (with standardized settings, naming conventions and outputted files in Standard SCORM 1.2 format). This required opening up the source files, making all the requested changes, saving them in the various formats, and lots of testing.

How Adobe Prime Works

The application is divided into four primary roles: Administrator, Integration Administrator, Author and Learner. Users can toggle back and forth between roles they have been assigned appropriate permission. In each of the four areas, video tutorials guide the way.

Learning Options
The learning options that we used to build a program from scratch were as follows:
1) Make sure you are logged in as an Author.
2) Add content. Go to the content Library and add your content (you’ll be able to upload a a variety of different file formats.

For Interactive Content
The supported format is .zip.

  • Scorm 1.2
  • Scorm 2004
  • AICC
  • TinCan

For Static Content

  • Videos: mp4, .avi, .wmv, .mov, .mpg, .m4v, .3gp
  • Pdf
  • PowerPoint – .pptx, .ppt
  • Word files – .docx, .doc
  • Excel files – .xslx, .xls

Step 1. Create courses. Combine any modules you have uploaded to create a course. This was straight forward to use you can drag and drop and rearrange with no difficulty.

Step 2. Create learning programs. Combine any courses that you want in an ordered or unordered fashion.

Step 3. Add users. They can be internal and external. We found that for testing purposes it was better to do this via an incognito window. Our client wanted an external user and attach learners to that user.

Types of Users
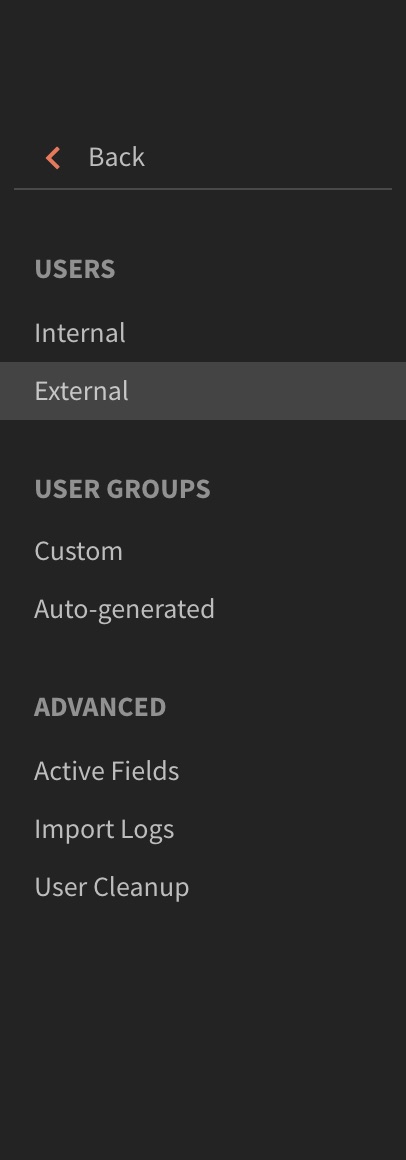
New users can be added in a number of ways. You can enter users individually, import them in bulk, and or allow users to self-register. There are two main groups of users: internal and external.

  • Internal users – You can add internal learners a few different ways. You’ll probably want to use the Bulk Import option. This allows you to use a standard CSV (comma-separated values or delimited) file that you generate from your organization’s human resources system. This is fast and easy. Besides expected fields such as names and email addresses, you can also import fields specific to your organization to include in the reports that Prime will generate. You can even have Prime automatically create groups for you from information in the CSV file, such as job categories, departments, and other factors. You can also set up other groups and even tenant-sharing.
  • External users – External learners are those who are not part of your organization. From within Prime, you create a group name for an external organization or category and generate a link and QR code to send to its external users. You can brand the group as well, a nice way of differentiating each group. The users who follow the link then create their own login name and password.

Step 4. Create learning plans.  Adobe Prime lets you set up events that are based on one of these occurrences:

  • A new user is added
  • A user is added to a group
  • A user completes a learning object
  • A user achieves a skill level
  • A date is added

Yeah you’re done…

Some Extra Notes

Reporting
Choose from sample reports or create your own. I found these to be really hassle-free. Prime tracks everything thrown at it—completion data, time spent, etc.—and then allows you to create reports from any and all data collected. You can create your own custom reports or base them on the following:

  • Enrolled and completed courses
  • Course effectiveness
  • Enrolled and completed learning programs
  • Learning time spent per course
  • Learning time spent per quarter
  • Assigned and achieved skills

Set up your X and Y axes and the time span, and you’re ready to go.

Some Important Prime Features

  • Mobile access – Learners can download the free Captivate Prime app to take courses on their mobile devices. I’d recommend the Mobile App it seems a little bit more polished.
  • Fluidic Player – When students launch courses, Prime’s Fluidic Player lets them very nicely experience all kinds of content, such as PDFs, videos, PowerPoints, and courses you’ve created in Adobe Captivate or similar products on different devices.
  • Adaptive video streaming – Prime is able to convert video embedded in Captivate into formats optimized for HTML5 and mobile devices.
  • Microlearning – The ability to combine the different resources and modules that you upload means it’s easy to combine them into short courses, learning programs, or certifications.

Final Thoughts

Using the product there was a little bit of a learning curve, and some of the features seem a little bit non-intuitive,  e.g. the Left menu keeps changing when the user clicks on a link, when it might be easier to just have an expanded and collapsed menu. Also, the lack of a larger community using the product is a limitation in terms of seeing from other users what’s worked and what hasn’t. The product seems constantly evolving which is good and bad. Good in terms that new features are being added. However, it is bad when there is a lack of communication with its users on what those changes are. Though, the product is imperfect there is still a lot to like about this product. It’s quite flexible in terms of gamification and microlearning. I’d recommend this product for people that are in this space and have been using other LMS products in the past.

My thoughts using Sketch

First some background information on myself.

I’m a big adobe creative suite user. I use the adobe suite for all aspects of creating designs for user interface, web, illustrations and print. I was finding that for rapid UI creation and creating screens for projects, illustrator was getting a little bloated. Illustrator is great for general creation but, with specific UI creation (rapid screen design) it’s a little slow. I did a couple of small projects for comparison purposes.

My Approach
My workflow for UI design is typically as follows: Requirements Documents, Balsmaiq, Illustrator and Silverlight (for high fidelity interactive prototypes). Using Sketch I found it simplified the process of by combing aspects of my workflow and being more of a lightweight product. The process for Sketch would be requirements docs, sketch and InVision.

Sketch is the ultimate tool for iOS, Android and Web design. It barely weights 41MB in disk space, compared to Illustrator’s 1.6GB. As soon as you open it, you are greeted with an infinite canvas. No window will ask you about what units to use or what size your canvas should be. Just like native OS X apps, you have a familiar user interface with a Toolbar, Navigator and Inspector. As a result, new users will find Sketch far more approachable because it doesn’t get in the way of producing simple designs.

Designing for Screens
You’re not overwhelmed by a Toolbar where half of the options were intended for photo editing, digital painting and 3D all screens are in pixels only.

There’s nothing wrong with them, but focusing on just user interface design will allow you to be more efficient and less distracted.

UI Templates
Sketch comes preloaded with a number of user interface templates for iOS, Material Design and Responsive Web. To access them for example you simply have to go File >New From Template > iOS UI Design.

A great place to download a unique templates for a specific requirements is:

https://www.sketchappsources.com/

Working With Text
If you’re new to typography, I suggest heading to the Typography section and start downloading a few modern fonts. The good ones that comes with OS X or free on Google Fonts are San Francisco, Avenir Next, Open Sans and Roboto. If you have a subscription to Typekit, download Museo and Proxima Nova.

Working With Icons
Last but not least, you’ll need in your arsenal a nice library of vector icons. The ones by PixelLove and Streamline will work well for iOS. Sketch is entirely vector-based so you can easily import SVG icons (a universal vector format), and edit them as you see fit. If you’re uncomfortable working with vector paths, you can at least change the color and size to fit your project. To get an introduction to vectors in Sketch, I suggest heading to the section

Working with Pages
Each Page represents a platform or a completely different resolution. For most projects, you’ll have twenty something Artboards for a platform like iOS. Then, you’d create another Page for Android, Web, Apple Watch, tvOS, etc. That way, you can have an entire project within a single Sketch file, saving you a ton of time switching between screens and platforms.

Working Symbols
I found this to be very powerful if not the most powerful feature. When I downloaded a bootstrap template it had all the buttons and states already in a library, before I would have to recreate this and now they are already available. This reminds me of coding the same feature is HTML CSS e.g. calling a particular class. Symbols work much the same way, I could call in the design with the appropriate state already based on the design requirement. Symbols makes it easy to share the same elements across multiple Artboards. This is especially useful when you re-use the same elements multiple times like for Status Bar, Navigation bar or Tab Bar. You won’t need to go back and edit those elements one by one. As you update one, it’ll synchronize to all the other ones that share the same Symbol.

Quick Export to Multiple Resolutions
Perhaps my favorite new feature is the ability to easily export at multiple screen resolutions. By using Make Exportable in the bottom right of the screen, you can export at any scale (1x, 2x, 3x) and 6 file formats (JPG, PNG, SVG, PDF, TIFF and EPS). PDF in particular is useful for iOS assets, and SVG is a fantastic format for the Web. For many users, this is what makes Sketch shine from the other apps.
Click Make Exportable to set up your slices. By default, it’ll set the scale at 1x, but click again and you’ll quickly get 2x, then 3x. You can also set the scale to a width (w) or height (h). For instance, if you wish your asset to export at maximum 800 px wide, set 800w.

Using Sketch and InVision
Sketch feels more like an open source product than illustrator. When combined with Invision a user can easily add interactive designs that come to life. Previously, a designer would have to design the screens before in illustrator than re-create them in another fashion like HTML, silverlight, PDFs etc to simulate some sort of interactivity. With Invision using the Craft plugin a designer can combine a couple of these steps and as a bonus can create interactive prototypes on a variety of platforms iOS, Android and iPad. The bonus of using InVision is the collaboration aspect, clients are able to draw on the prototype and individual screens which is much faster than sending emails back and fourth.

https://www.invisionapp.com/sketch-prototyping
https://www.invisionapp.com/craft