The post How to bulk upload on Adobe Captivate Prime without using the built-in feature appeared first on Euphoria Interactive.
]]>Here where things get a little bit challenging.
Currently, Adobe Captivate Prime is an LMS System which once you get the hang of it works intelligently but, what happens when things don’t work as expected?
The bulk upload feature via CSV is a pretty standard way of populating data. Basically, we have to have a basic CSV file with a basic data set “Name“, “Email“, “Profile” and “Manager“.
Seems pretty basic right?
Well, I followed Adobe Prime’s instructions to the letter and it didn’t work.
https://helpx.adobe.com/ca/captivate-prime/administrators/add-users-in-bulk.html
I tried many variations in terms of structure and logic. I even downloaded their sample CSV file to see if I could get it to work. Still no luck but was learning more after reading their forums.
https://forums.adobe.com/community/captivate_prime
What, I gleaned off of their forum was that the feature is broken. I assume at one point is was working correctly but, it is fundamentally flawed. The one thing I noticed that it was easy to upload the file but, every time there was an error in the processing. Usually, when you upload a CSV file it will typically update any of the fields that have changed e.g. first name is John not Johnny. However, in Adobe Prime you will get an error. Even with a unique dataset for the CSV there is typically an error with little description to what the problem is e.g. an internal error has occurred.
One thing that I noticed when I tried to manually add a single user via the website it worked without any issue.
Here is some background about myself. I started off in the software consulting world was a web designer but, gradually I learned how to code in a variety of languages and platforms. One experience, that I thought be helpful was during software testing.
Typically, when testing software or websites it becomes very repetitive. That’s when software testing tools come to play. What I used previously was selenium.
What selenium does, it allows the end-user to record their actions on the screen. It converts them to scripts which you can automate and program. I’m a Mac user and found that using VMWare wasn’t ideal. I was getting limited success but, thought I was on the right track.
The solution was to record the steps correctly, create a loop and automate it. I found a better tool with lots of documentation.
Katalon Studio is a cross platform solution to run automation tests.
The first step is to record the screen accurately. At first, I recorded all the actions e.g. go to URL login, etc. What I really wanted was just to “Add a Single User” and repeat it based off of sample data in a CSV file.
The difficult part was selecting the right elements to record. In Adobe Prime all the fields are very dynamic with unique IDs based off of the user session ID (which means when you shut the browser window and re-open it won’t work). After experimenting with capturing CSS ids and Divs (neither worked well). What seemed to work the best is xpath values.
An example is something like this (don’t worry the tool generates this for you)
Below is the name input field for “Add a Single User“.
xpath=(.//*[normalize-space(text()) and normalize-space(.)=’Name’])[2]/following::input[1]
With the tool I was able to capture the flow but, it seemed a little complex. I discovered a sister product which was able to do it perfectly Kantalon Recorder Plug-in for Chrome. I was able to reproduce a dynamic record that would show up as an internal user with a click of a button.
How to automate this?
One record wasn’t really going to help me. What about 10? Or 1000? Well, with this tool I was able to automate it with a CSV file.
The trick was to figure out how to attach a CSV file automate the output and loop through the records.
In the tool there is a tab called “Data Driven“, click “Add CSV File“. The attached file has been added to the tool. I then had to change the hard coded values to dynamic values e.g. John Smith becomes ${Name} (this is the same name as your column header in your CSV file). All I had to was match the header names to the hardcoded values e.g. ${Name}, ${Email}, ${Profile} and ${Manager}.
The one thing I had to do to make the file all work was to add one command at the start.
LoadVars
Target: The Path to your CSV file. I put it at the root of the saved project to make it easy e.g. “My_Data.csv”
At the end add a new command
endLoadVars
That’s it, best off this plug-in is free and cross platform.
Step 1
Install the Katalon Recorder Plug in
https://chrome.google.com/webstore/detail/katalon-recorder-selenium/ljdobmomdgdljniojadhoplhkpialdid
Step 2
Log-in to Adobe Prime as an Administrator
Step 3
Click on the Side Nav bar to Users
Step 4
Launch the Chrome Extension Kantalon Recorder
Step 5
Open the file in Katalon Recorder
Add a User to Adobe Prime.html
(Please note: this file reads “Users Sample.csv” (which contains a list of all users to be added)).
Step 6
Ensure the speed is set to medium-fast. Click the play all button. This will add all the users from the CSV file to Adobe Prime.
(Please note: this is a one-time use, new users must be added in a new file)
Download the CSV Upload Engine for Adobe Captivate Prime
Good luck! I hope my solution will work for you.
The post How to bulk upload on Adobe Captivate Prime without using the built-in feature appeared first on Euphoria Interactive.
]]>The post Articulate Storyline 2 versus Storyline 3 which one is better? appeared first on Euphoria Interactive.
]]>Here is some my background, I’m a Macbook Pro user using High Sierra running VMWare Fusion. I come from a design background with web and mobile development experience.
I wanted to test to see what the differences were between Storyline 2 and 3. Most of our customers are large organizations and we wanted to test drive Storyline 3 before making a recommendation.
Overall Storyline 3 comes as an improvement to its predecessor Storyline 2.
A trial version of Storyline 3 can be downloaded here:
https://articulate.com/p/trial?product=storyline-3
Some of the main differences between Storyline 2 and 3 are as follows:
New Responsive Player
Storyline 3 has a new responsive player that adjusts the course content to various devices such as smartphones and tablets without any additional programming.
Custom Closed Captions
Storyline 3 supports customizing closed captioning while helping you create more accessible eLearning. It supports all the standard caption files. You can import, export, show and hide the captions at your convenience. You can even use the custom fonts for closed captions.
Superior HTML5 Output
Articulate has put a lot of effort to fine tune the HTML5 output so that your eLearning courses work smoothly on any device. Articulate claims that no matter how custom or complex your eLearning course design gets, it’s going to run on any device or browser. Elearning developers can now choose a format they desire and create responsive HTML5-based eLearning content. All you have to do is simply drag the ‘Publish As’ slider and choose the desired publishing options.
Better Starting Templates
Articulate has some smart looking templates which cover the core features an elearning developer needs.
Our tests upgrading a project from Storyline 2 to 3
I took one of the courses we had previously developed which I had had to customize to get it to work properly. With Storyline 2, I had to write a fair amount of custom javascript and other workarounds with states and variables in order to get everything to work.
I did a full publish in Storyline 3 and below are my comments:
-
The Storyline 3 player forces older storyline projects to be upgraded. It creates a backup of the older project so no need to worry about losing it.
-
Publish speeds seem about the same.
-
The user interface of the product seems a little faster and more polished.
-
There are different loader screens after publishing – gone is the spinner, now it’s just 3 dots.
-
The HTML5 version seems a little faster in terms of load time.
-
Some of the javascript, tweaks of states etc. I had made previously in Storyline 2 don’t seem to work correctly in Storyline 3.
-
I installed the mobile Articulate Player app. It didn’t seem to work. All I got was a blank screen. I could not bring up menus. (Hmmm not a strong recommendation for mobile only use).
-
I uninstalled the Articulate Player app on my phone and tried again.
-
I viewed the course on an Android Pixel 2 phone which took me to the Google Play store but I got a blank screen.
- The video player seems to work better in HTML. I’m able to skip to certain sections.
- The embed code works for videos in HTML5 and Flash (though no one uses it anymore).
- Good testing for playback on various devices e.g. desktop and mobile.
- States and Javascripts seem more accurate. When I compare the amount of code I had to add in order for Storyline 2 to work versus 3. It has been reduced greatly.
- Screen recordings have been greatly improved. Screen elements before were shifting and moving for HTML5. They have all been fixed. Looks solid.
Link to Latest Version of Articulate Mobile Player
https://play.google.com/store/apps/details?id=air.com.articulate.articulatemobileplayer
Samples of Glitchy Screens when Upgraded Project from Storyline 2 to Storyline 3
Image 1: Image of hand is repeated and multiple selections on screen are highlighted simultaneously.
![]()
Image 2: Masking seems to cut off the text slightly (see final bullet on page, text is cut off).
![]()
Conclusion
Choosing the right elearning authoring tool for responsive mobile learning is a bit overwhelming. Storyline 3 is a simple and intuitive authoring tool with a short learning curve. Though Storyline 3 addresses the concerns of multi-device eLearning, it is not very effective for developing fully responsive eLearning courses. The responsive player shrinks the content to the screen size of the device instead of adapting the layout. Articulate hasn’t made an attempt to address this issue in Storyline 3. Overall, it fixes many of the Storyline 2 problem in terms of HTML5, though I wouldn’t recommend upgrading existing projects from 2 to 3. I would recommend however recommend choosing Storyline 3 over Storyline 2. You’ll save lots of time in testing and coding.
The post Articulate Storyline 2 versus Storyline 3 which one is better? appeared first on Euphoria Interactive.
]]>The post Using and Setting up Adobe Prime from our Perspective appeared first on Euphoria Interactive.
]]>I’d recommend this product for medium to large organizations that require: solid functionality, decent reporting and a mobile friendly experience.
I was given the task of working with a client who had difficulty integrating Adobe Prime as a Learning Management System in their organization. Some of the issues were related to migrating from Adobe Connect (a repository for content that can be consumed for other LMS systems) and others were related to lack of documentation from Adobe Prime.
Here were some of the constraints with the project :
- The majority of content was designed for Adobe Connect
- Starting with a large library of content in a variety of formats that were mostly produced by Adobe Captivate
- Multiple standards from a variety of different vendors
- Starting with a large number of zipped folders that were made in a variety of formats e.g. zipped versions of Adobe Connect and SCORM 1.2 files
- Multi-language setup
- Previous administrator had uploaded Adobe Connect files to Prime
- Adobe Prime has little documentation, no stackoverflow, no user forums outside of the Adobe community
Where to begin?
Prepping for Adobe Prime
First we had to do a full audit of the zipped files and source files and apply some standards e.g. all files are Captivate 10 (with standardized settings, naming conventions and outputted files in Standard SCORM 1.2 format). This required opening up the source files, making all the requested changes, saving them in the various formats, and lots of testing.
How Adobe Prime Works
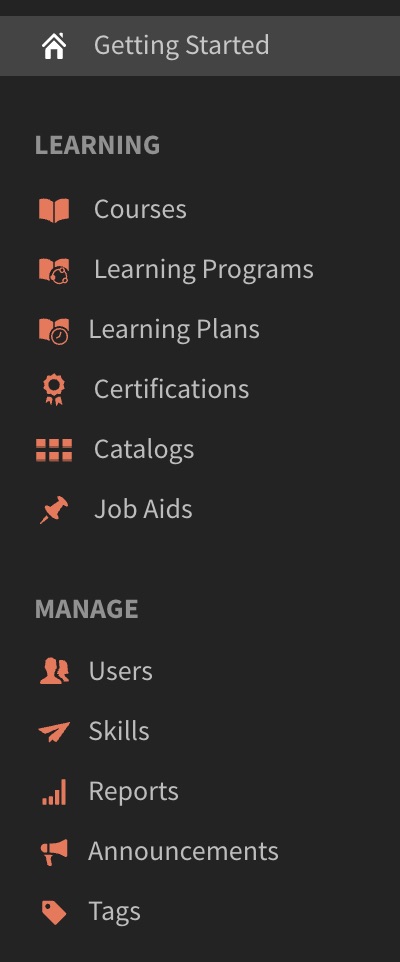
The application is divided into four primary roles: Administrator, Integration Administrator, Author and Learner. Users can toggle back and forth between roles they have been assigned appropriate permission. In each of the four areas, video tutorials guide the way.
Learning Options
The learning options that we used to build a program from scratch were as follows:
1) Make sure you are logged in as an Author.
2) Add content. Go to the content Library and add your content (you’ll be able to upload a a variety of different file formats.
For Interactive Content
The supported format is .zip.
- Scorm 1.2
- Scorm 2004
- AICC
- TinCan
For Static Content
- Videos: mp4, .avi, .wmv, .mov, .mpg, .m4v, .3gp
- PowerPoint – .pptx, .ppt
- Word files – .docx, .doc
- Excel files – .xslx, .xls
Step 1. Create courses. Combine any modules you have uploaded to create a course. This was straight forward to use you can drag and drop and rearrange with no difficulty.
Step 2. Create learning programs. Combine any courses that you want in an ordered or unordered fashion.
Step 3. Add users. They can be internal and external. We found that for testing purposes it was better to do this via an incognito window. Our client wanted an external user and attach learners to that user.

Types of Users
New users can be added in a number of ways. You can enter users individually, import them in bulk, and or allow users to self-register. There are two main groups of users: internal and external.
- Internal users – You can add internal learners a few different ways. You’ll probably want to use the Bulk Import option. This allows you to use a standard CSV (comma-separated values or delimited) file that you generate from your organization’s human resources system. This is fast and easy. Besides expected fields such as names and email addresses, you can also import fields specific to your organization to include in the reports that Prime will generate. You can even have Prime automatically create groups for you from information in the CSV file, such as job categories, departments, and other factors. You can also set up other groups and even tenant-sharing.
- External users – External learners are those who are not part of your organization. From within Prime, you create a group name for an external organization or category and generate a link and QR code to send to its external users. You can brand the group as well, a nice way of differentiating each group. The users who follow the link then create their own login name and password.
Step 4. Create learning plans. Adobe Prime lets you set up events that are based on one of these occurrences:
- A new user is added
- A user is added to a group
- A user completes a learning object
- A user achieves a skill level
- A date is added
Yeah you’re done…
Some Extra Notes
Reporting
Choose from sample reports or create your own. I found these to be really hassle-free. Prime tracks everything thrown at it—completion data, time spent, etc.—and then allows you to create reports from any and all data collected. You can create your own custom reports or base them on the following:
- Enrolled and completed courses
- Course effectiveness
- Enrolled and completed learning programs
- Learning time spent per course
- Learning time spent per quarter
- Assigned and achieved skills
Set up your X and Y axes and the time span, and you’re ready to go.
Some Important Prime Features
- Mobile access – Learners can download the free Captivate Prime app to take courses on their mobile devices. I’d recommend the Mobile App it seems a little bit more polished.
- Fluidic Player – When students launch courses, Prime’s Fluidic Player lets them very nicely experience all kinds of content, such as PDFs, videos, PowerPoints, and courses you’ve created in Adobe Captivate or similar products on different devices.
- Adaptive video streaming – Prime is able to convert video embedded in Captivate into formats optimized for HTML5 and mobile devices.
- Microlearning – The ability to combine the different resources and modules that you upload means it’s easy to combine them into short courses, learning programs, or certifications.
Final Thoughts
Using the product there was a little bit of a learning curve, and some of the features seem a little bit non-intuitive, e.g. the Left menu keeps changing when the user clicks on a link, when it might be easier to just have an expanded and collapsed menu. Also, the lack of a larger community using the product is a limitation in terms of seeing from other users what’s worked and what hasn’t. The product seems constantly evolving which is good and bad. Good in terms that new features are being added. However, it is bad when there is a lack of communication with its users on what those changes are. Though, the product is imperfect there is still a lot to like about this product. It’s quite flexible in terms of gamification and microlearning. I’d recommend this product for people that are in this space and have been using other LMS products in the past.
The post Using and Setting up Adobe Prime from our Perspective appeared first on Euphoria Interactive.
]]>The post E-Learning for Corporate Training – What you Need to Consider appeared first on Euphoria Interactive.
]]>Are the learning objectives and goals measurable?
Ensure that the objectives and outcomes for the course are well planned and clearly outlined. Having well developed expectations set from the outset provides a clear path for the learner. This also serves as a roadmap for the delivery of the content. In other words, the objectives should read; “At the end of this course you will be able to…” as opposed to “This course will teach you…”
At the end of each section, refer back to the objectives to reinforce the relevance of the content. In doing so, this roadmap emphasizes the key components of the course. This, in turn, provides the learner with a clear path so they feel the learning is a valuable use of their time.
According to Adobe Articulate’s e-Learning community, one of the world’s leading e-learning software provider, understanding why the course is being built and what the learner will take away from it, helps to create learning objectives that meet the course’s goals.
Who are the learners?
When it comes to learning, one size does not fit all. It is important to incorporate various e-Learning tools in order to ensure the content is effective for all learning styles and approaches. A major selling feature of e-Learning is the ability to learn anything, anywhere. This can be accomplished by integrating interactive content to engage the learner. At the same time, these tools test the knowledge gained. Clients can then customize the e-Learning programs by picking and choosing the tools they feel are best suited for the learners. Clients can empower their employees to learn more effectively and at their own pace by taking advantage of this flexibility.
Is the content accessible?
Not only must the content be relevant and presented in an engaging and effective manner, it must also be accessible. Learners may miss content or give up entirely if it is not easy to navigate through the content. Keep in mind the technology level of the users when developing the layout and delivery of the content. What is the point of developing a flashy e-Learning program with all the bells and whistles if the learners are not able to navigate it?
At the other end of the spectrum, if the graphics are outdated, for example images of professionals with flip phones, or of poor quality, this could be translated to the content being obsolete.
E-Learning programs hit the mark when they are user friendly and the content is presented in a clear and professional manner.
What are the end goals?
Be sure to review the content from their perspective, in order to increase the buy-in from the learner. Here are some questions to consider:
• What will I get out of this? / What’s in it for me?
• How is the content related to my day-to-day activities?
• Why do I have to take this course? I don’t have time.
• Will this course lead to advancement in the company?
• Will this course help me to do my job more effectively/efficiently?
• How will I be recognized / rewarded for completing this course?
It is important that the learner sees the advantages and relevance of what they are learning. As employers, it is essential to provide employees with the tools and resources they need to succeed in their role. Therefore, the employee must be able to take the outcomes of the course and directly relate them to their role within the organization. It also demonstrates that the company is investing in them by expanding their skill sets and knowledge.
Are you tracking the results of the training?
Another key factor is to do a check once the training is complete. The Kirkpatrick Four-Level Training Evaluation Model can be employed to gauge the outcome of the training. This model considers the following levels of post-training:
• Reaction: The degree to which participants react favourably to the training. (Did the participants like the training?)
• Learning: The degree to which the participants acquired the intended knowledge and skills. (Are the participants getting the knowledge they require to fulfill their current role).
• Behaviour: The degree to which the knowledge gained through the training is applied to their daily activities on the job. (Will the participants use the training in their daily performance on the job?)
• Results: The degree to which the desired outcomes were met as a direct result of the training. (Did the training succeed at achieving the initial goals?)
Many learning systems focus on the delivery of the training. This includes incorporating interactivity to gauge the participants’ motivation and assessments to measure retention. However, it is essential to include tools to track the results and to provide on the job resources or job aids as a form of on-going support.
With these key points in mind, e-Learning can become an effective complement to more traditional corporate training approaches.
The post E-Learning for Corporate Training – What you Need to Consider appeared first on Euphoria Interactive.
]]>